# Configure AI behavior in GPT for Docs
Configure model settings to customize how GPT for Docs generates responses.
> **Info**
>
> Model settings are specific to each document.
## Select where to insert text
Use the **Insert settings** to insert the generated text exactly where you want it, highlight generated text, or add the prompt to your document.
[Watch video on YouTube](https://www.youtube.com/watch?v=lLzW141krV8)
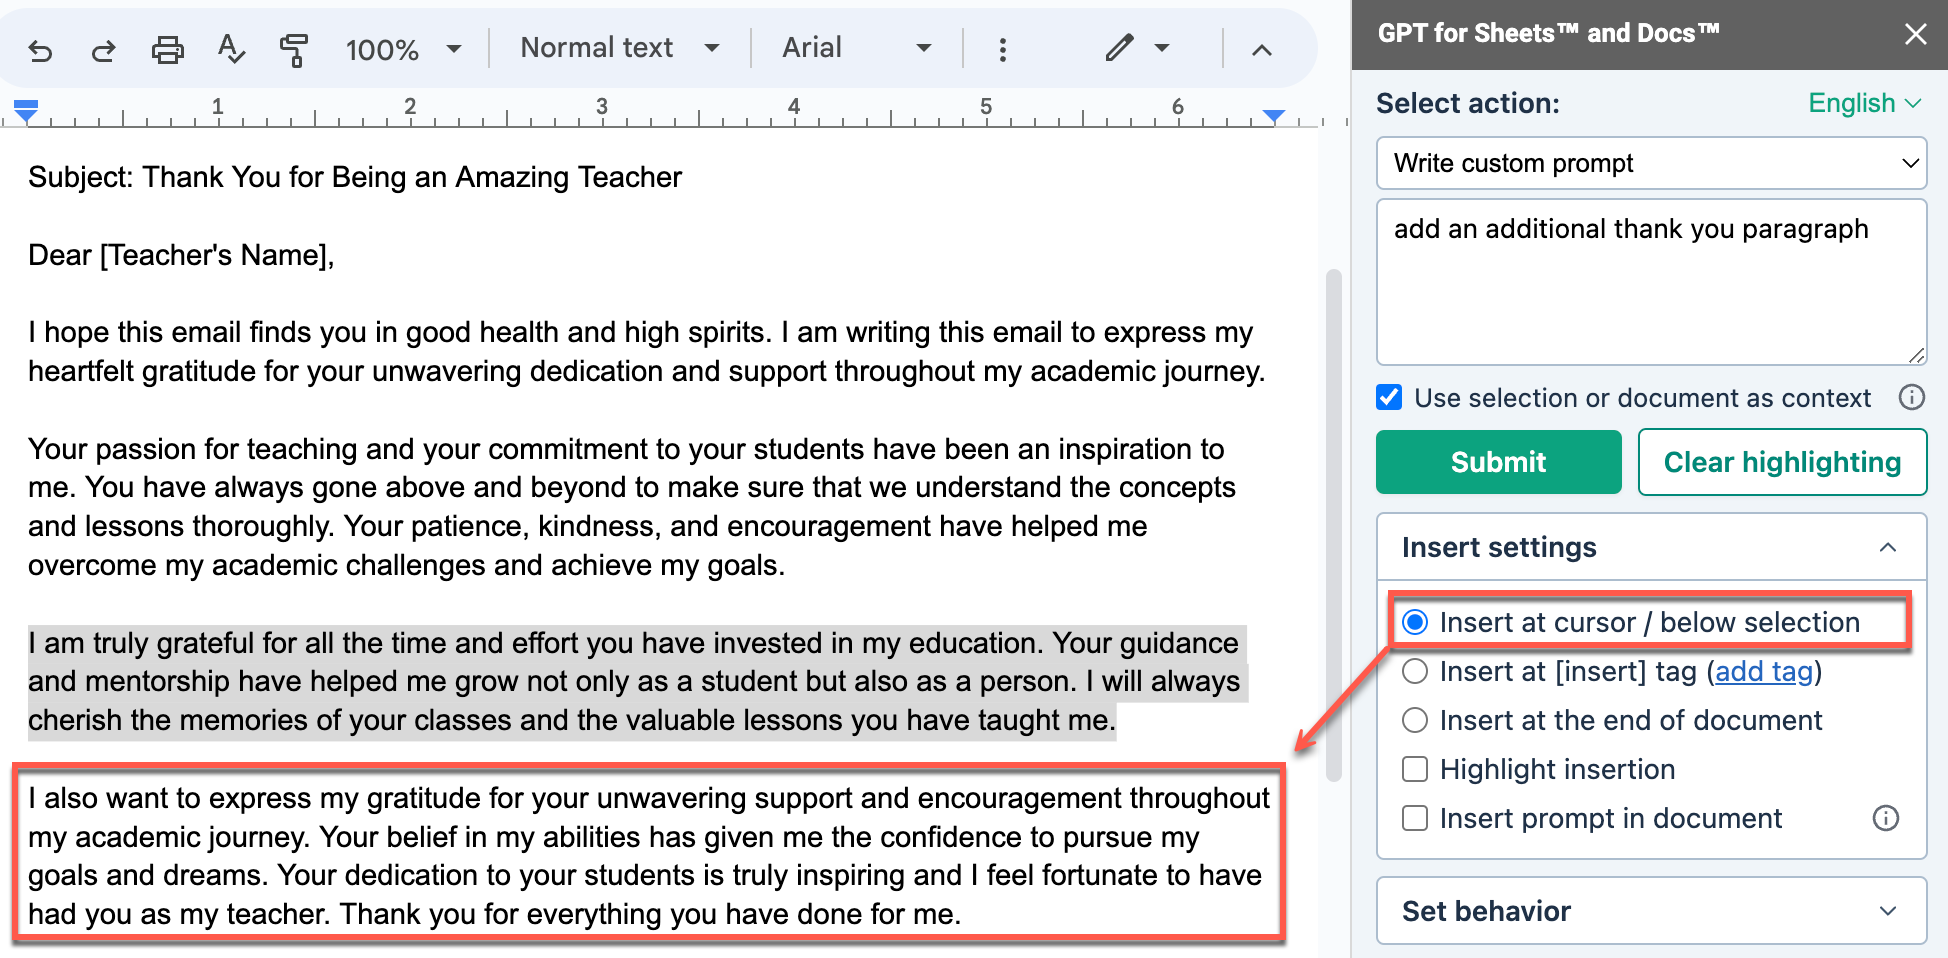
### Insert at cursor / below selection
When you select **Insert at cursor / below selection**, GPT for Docs inserts the text at the cursor position if you did not select any text, or below the selected text.
### Insert at \[insert] tag
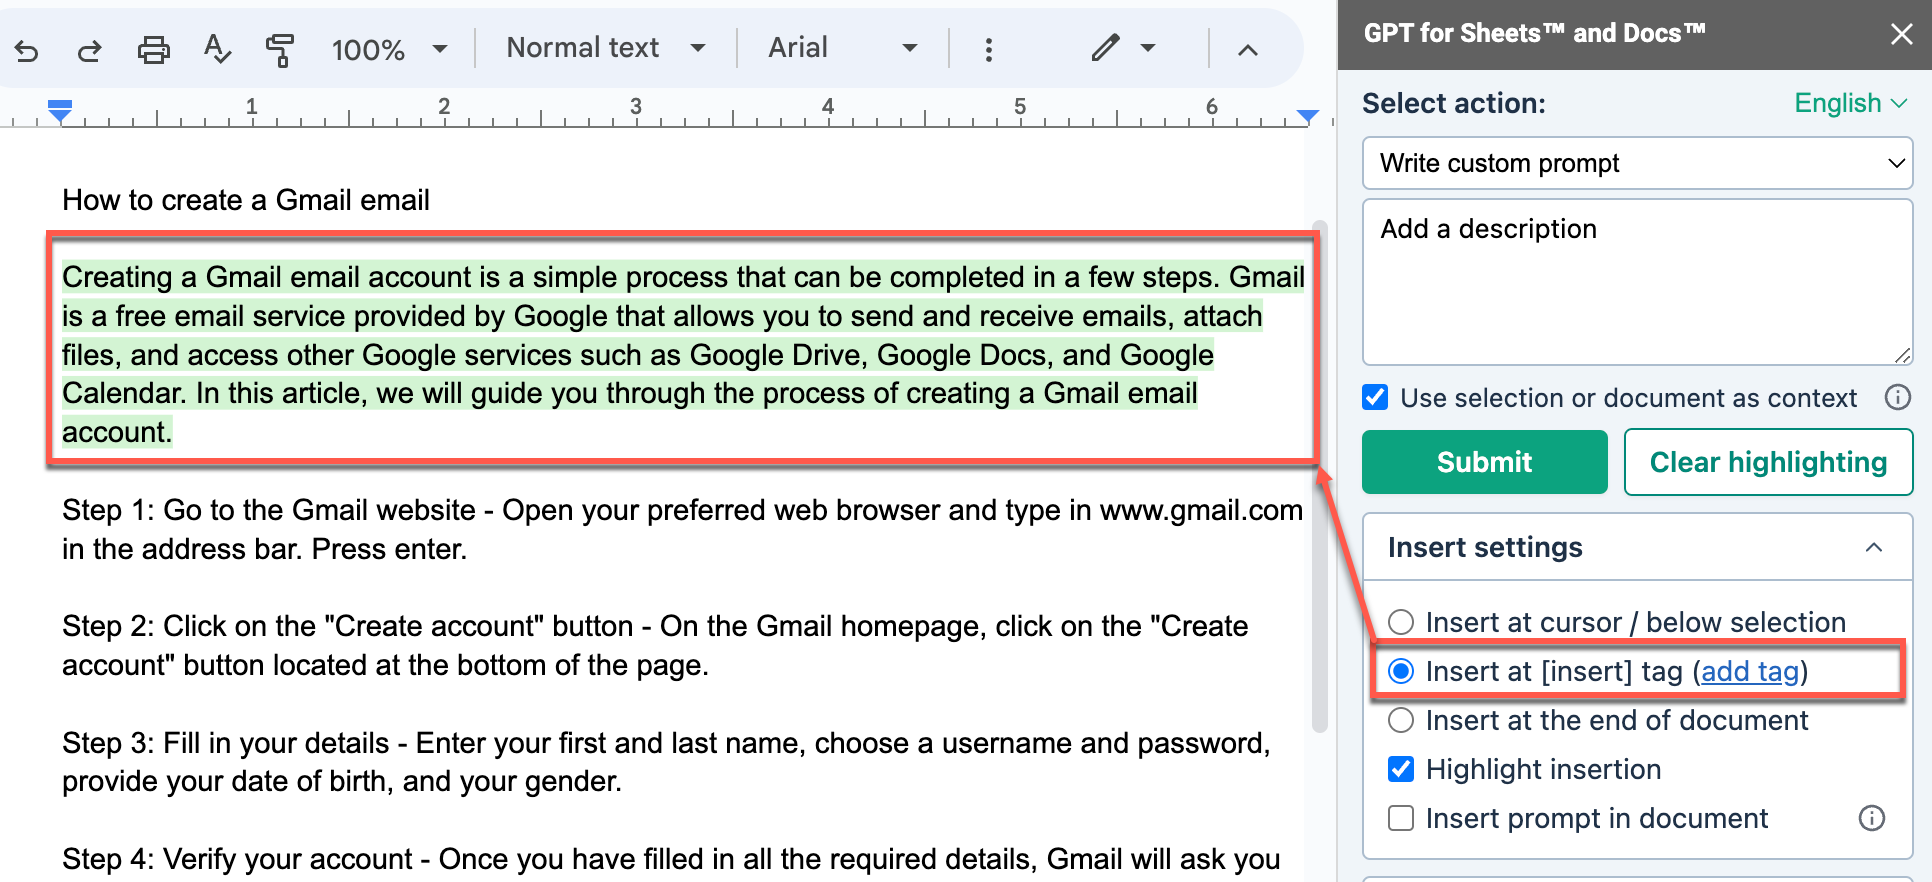
When you select **Insert at \[insert] tag**, GPT for Docs replaces the *\[insert]* tag with the response in your document.
To add a tag, you can:
- Write **\[insert]** in your document
- Position the cursor in your document, and click **add tag**.
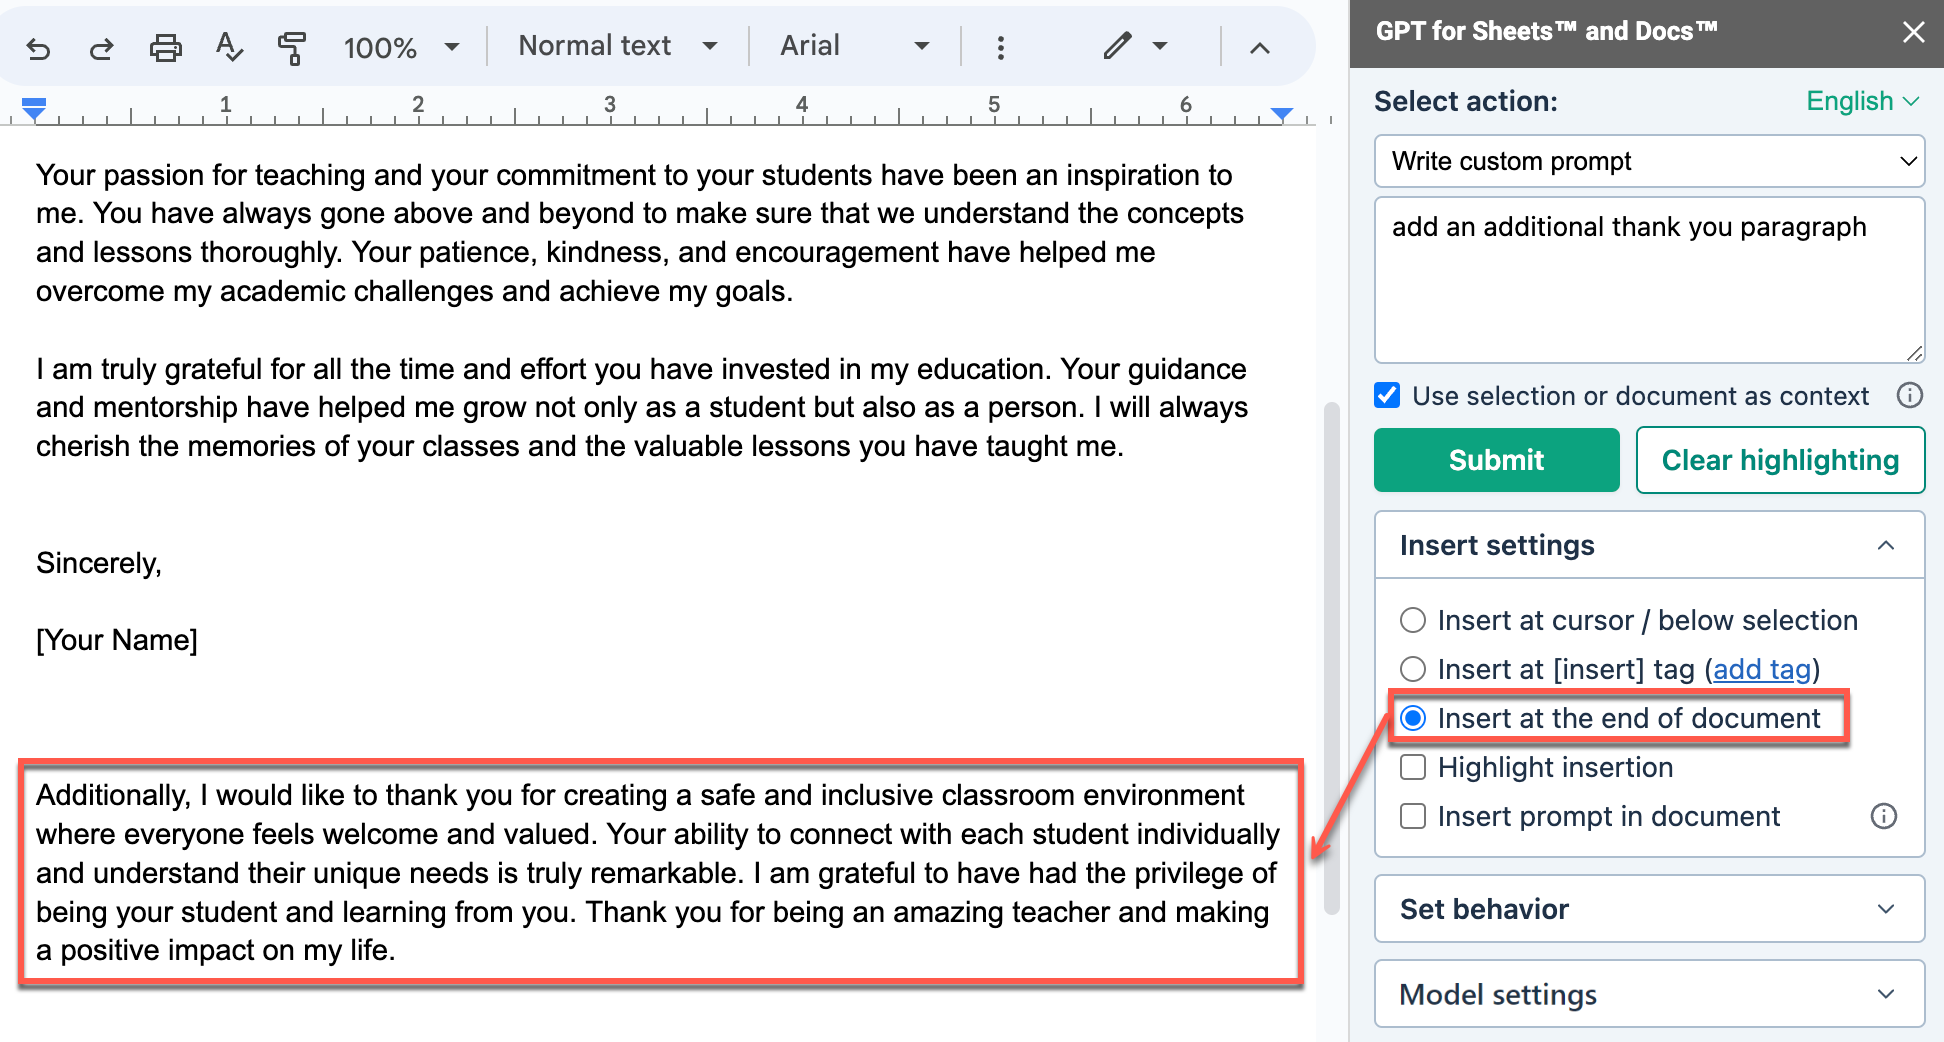
### Insert at the end of document
When you select **Insert at the end of document**, GPT for Docs inserts the response at the end of the document.
### Highlight insertion
When you select **Highlight insertion**, GPT for Docs highlights the generated response in green in your document.
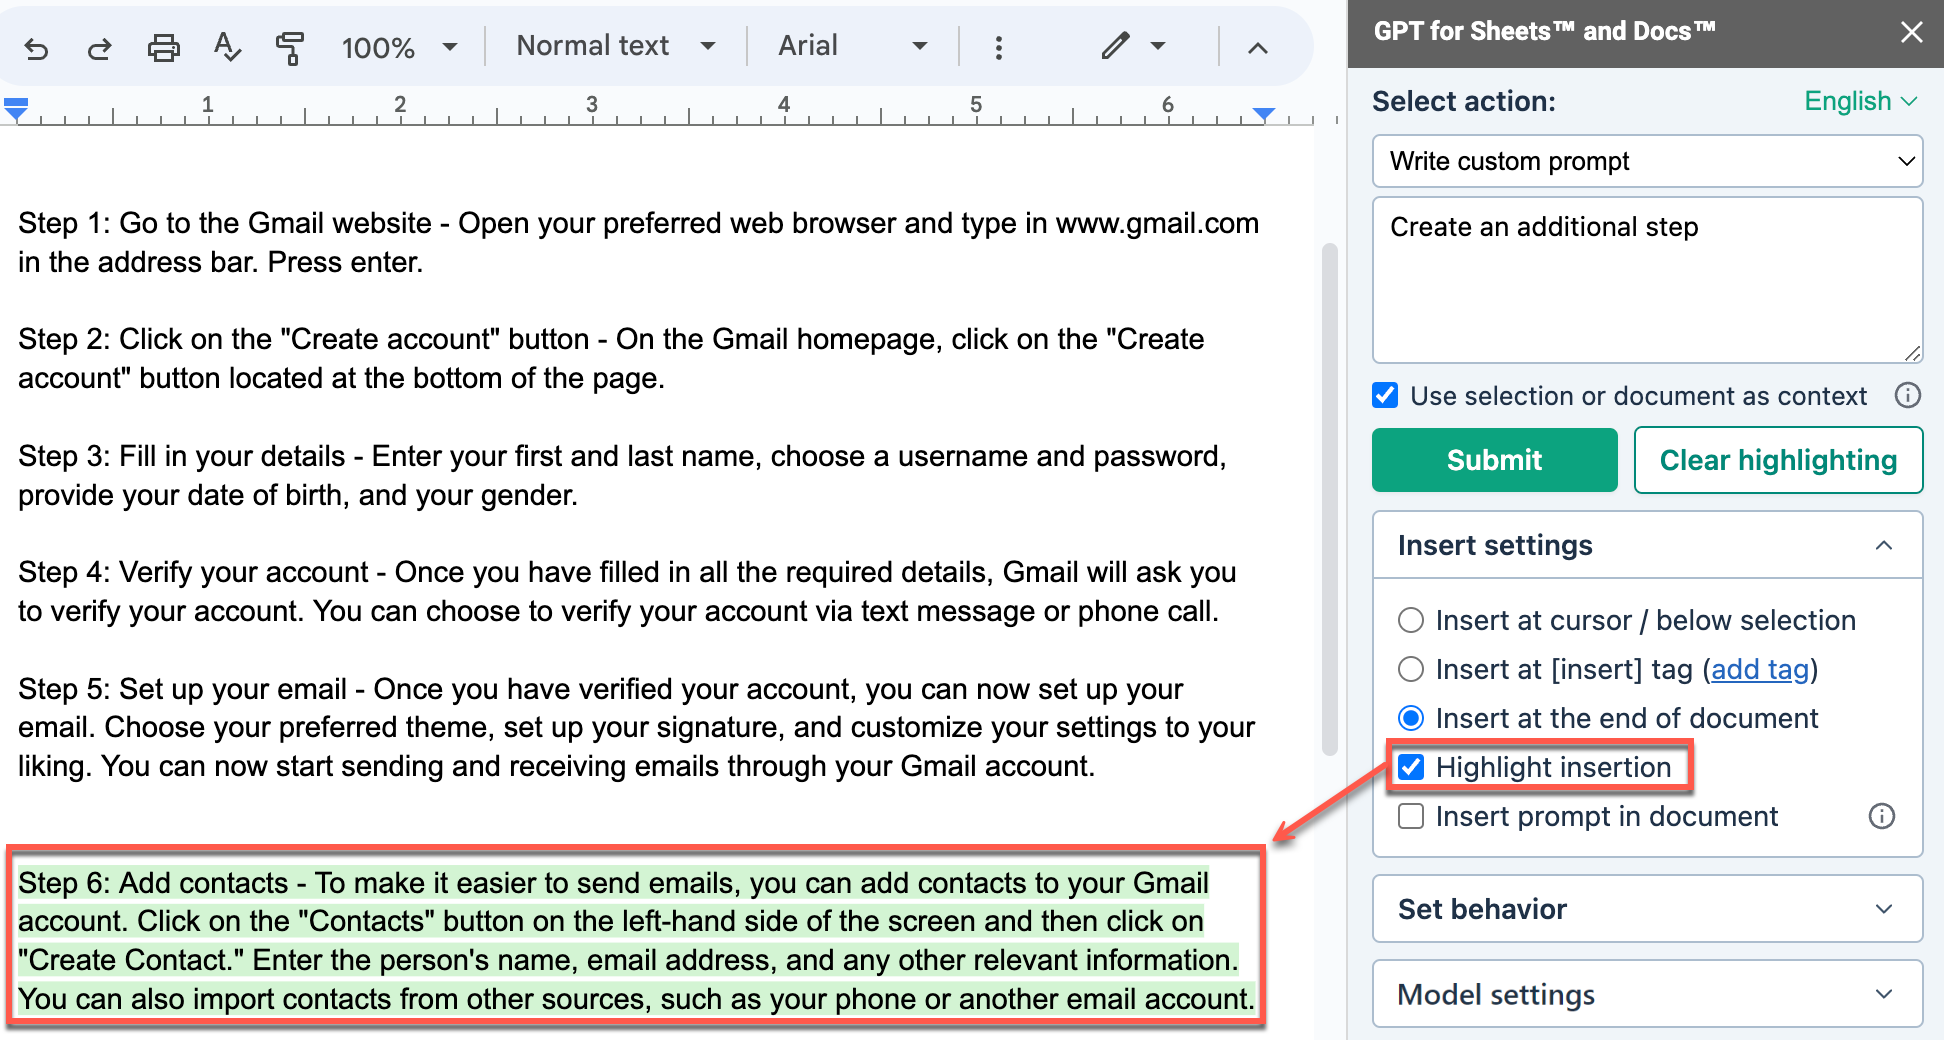
Click the **Clear highlighting** button to remove the highlights on previous responses.
### Insert prompt in document
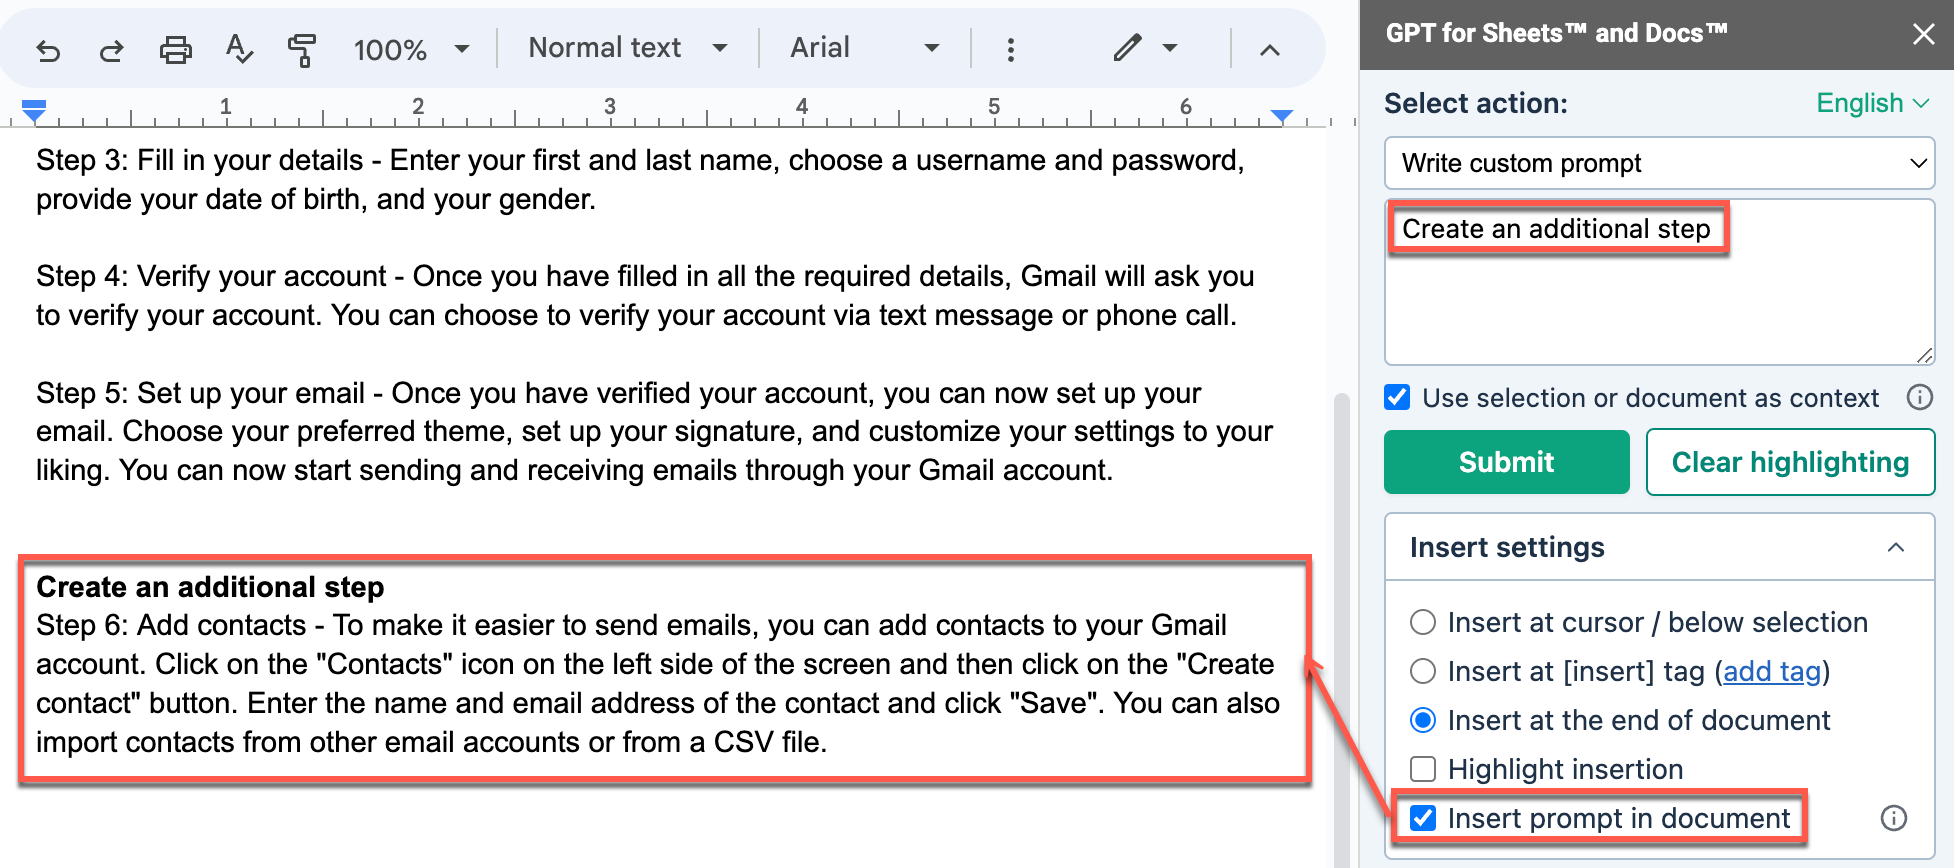
When you select **Insert prompt in document**, GPT for Docs adds the prompt in bold when inserting the response in the document.
## Add custom instructions
Provide custom instructions to specify preferences or requirements that you'd like the AI to consider when generating responses.
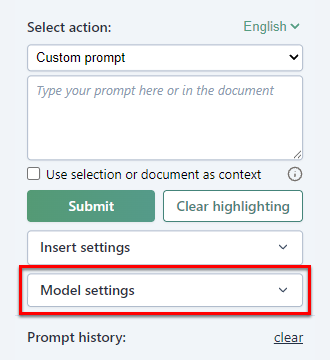
1. In the GPT for Docs sidebar, expand **Model settings**.
2. Select the type of instructions you'd like to add and edit them if needed.

The AI takes the custom instructions into account when generating responses in the current document.
## Set the creativity level
Control how creative the AI is by setting the temperature and top-p parameters. The parameters work together to define overall creativity. Lower creativity generates responses that are straightforward and predictable, while higher creativity generates responses that are more random and varied.
> **Tip**
>
> For more information about temperature as used by OpenAI to set the creativity level, see our [temperature guide](https://autosheet.com/guides/openai-gpt-ai-temperature).
| Parameter | Description | How to use |
| --------------- | ----------------------------------- | ---------------------------------------------------------------------------------------------------------------- |
| **Temperature** | Controls randomness in the output. | - Possible values: **0-1**
- Keep at **1** if adjusting **Top P**
- Lower for factual, higher for creative |
| **Top P** | Controls diversity of word choices. | - Possible values: **0-1**
- Keep at **1** for most use cases
- Only lower if **Temperature** is **1** |
1. In the GPT for Docs sidebar, expand **Model settings**.

2. Set **Temperature** between **0** and **1**. You can refer to the following:
- **0**: Precise, the model strictly follows the prompt
- **0.5**: Neutral, the model is slightly creative
- **1**: Creative, the model is very creative
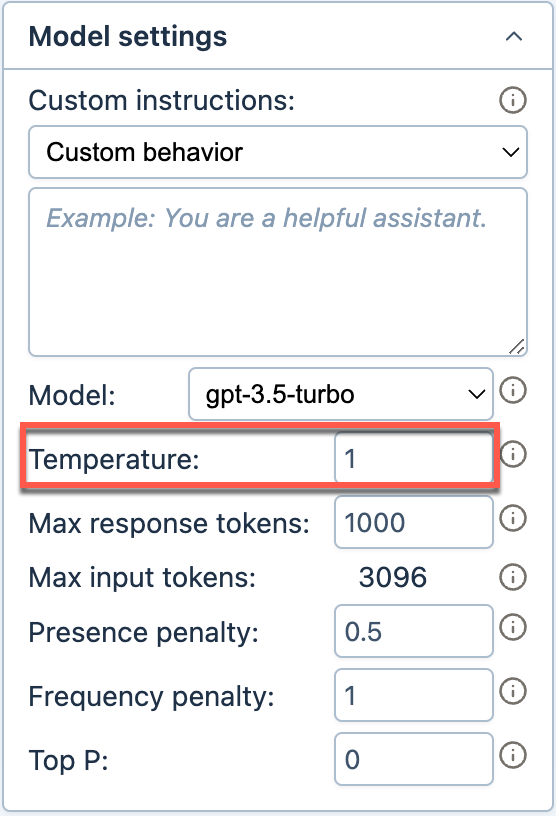
3. (Optional) Set **Top P** between **0** for a focused output and **1** for most creativity.
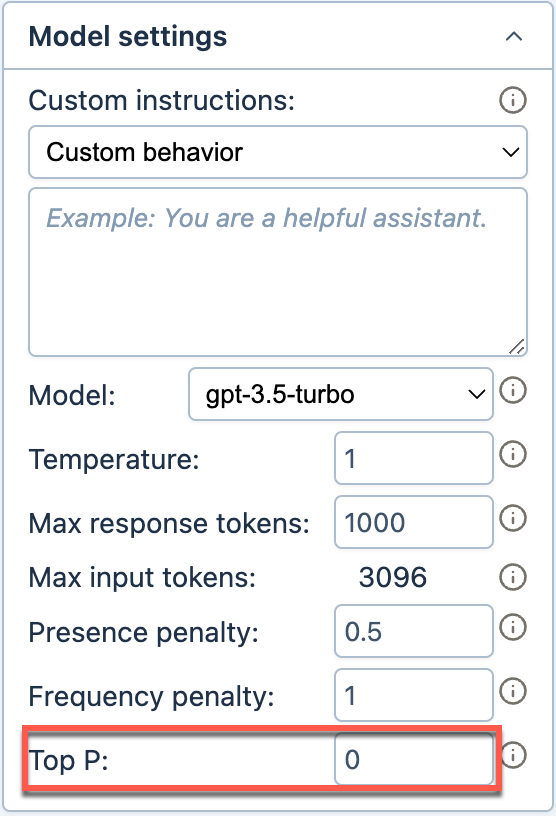
The AI uses the new temperature and top-p values when generating responses in the current document.
## Set maximum response size
Set a cut-off limit for your responses (measured in tokens). If the response is larger than this limit, the response is truncated. This helps control cost and speed.
| Term | Definition |
| --------------- | ------------------------------------------------------------------------------------------------------------------------------------------------------------------------------------------------------------------------------------------------------------------------------------------------------------------------------------------------------------------------------------------------------------------------------------------------------------------------------------------------------------------------------------------ |
| **Token** | A token is a unit of text, such as a word, subword, punctuation mark, or symbol. Models split all input and output text into tokens for processing. Model providers use tokens as the basic unit for measuring model usage. Input tokens from your prompt and output tokens from the model's response contribute to your credit consumption. For more information, see [Tokens](https://autosheet.com/docs/resources/models/tokens) and [How credits are consumed](https://autosheet.com/docs/resources/pricing/how-credits-are-consumed). |
| **Token limit** | Token limit is the maximum total number of tokens that can be used in both the input (prompt) and the response (completion) when interacting with a language model. |
1. In the GPT for Docs sidebar, expand **Model settings**.

2. Enter a value for **Max response tokens**.
*Rule: max response tokens + input tokens ≤ token limit*
This means that when you set **Max response tokens**, you must make sure there is enough space for your input. Your input includes your prompt, custom instructions, context, and elements sent by GPT for Docs with your input (about 100 extra tokens). You can use [OpenAI’s official tokenizer](https://platform.openai.com/tokenizer) to estimate the number of tokens you need in your response.
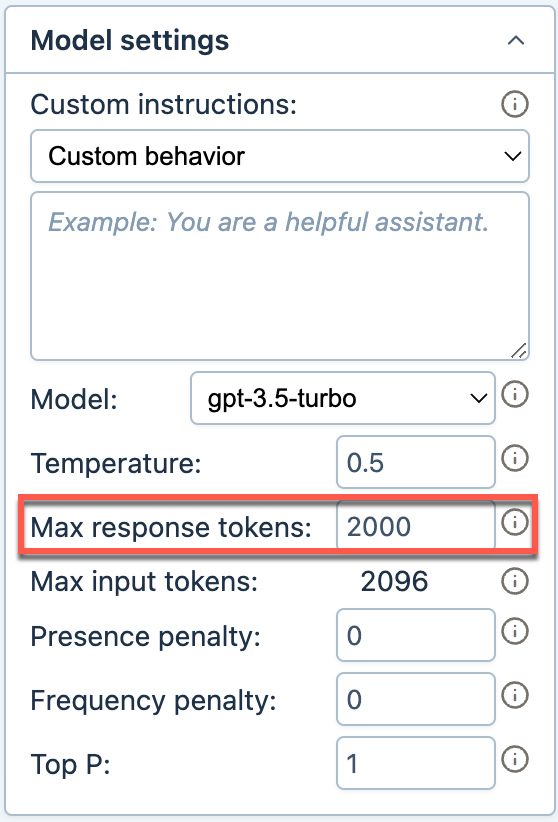
The AI observes the new maximum response size when generating responses in the current document.
## Select the prompt language
To get more accurate responses from the AI, define the language in which you write prompts and custom instructions.
1. In the GPT for Docs sidebar, click the dropdown located in the upper right corner.
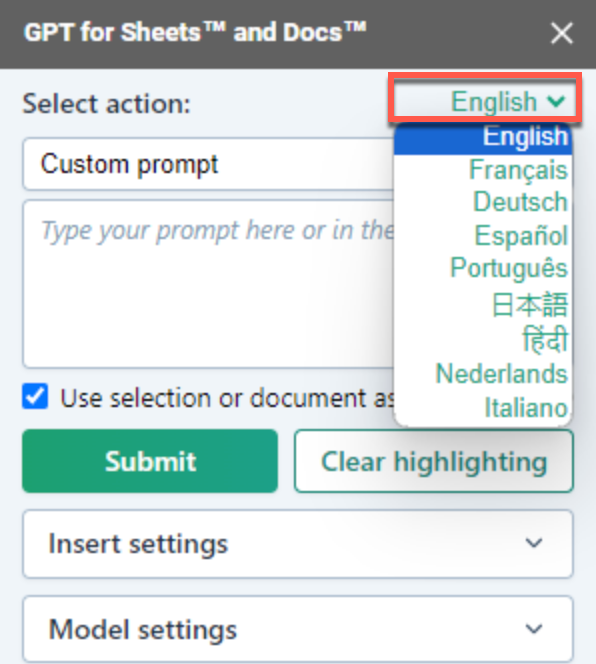
2. Select your prompt language.
The elements in the sidebar that are to be submitted along with your input are now displayed in the selected language.
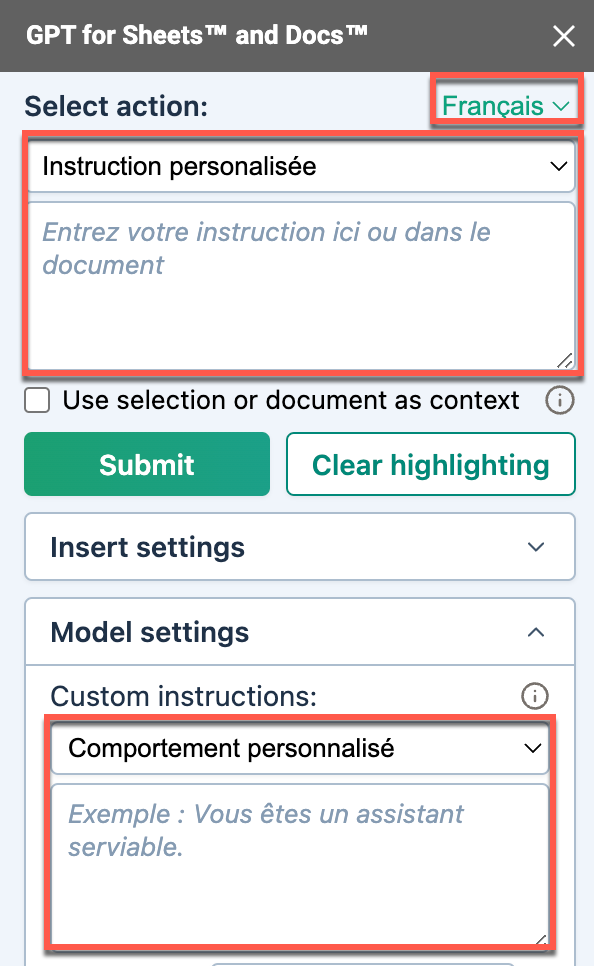
The AI uses the selected language as the default for understanding your prompts and custom instructions.
## Reduce AI response repetition with OpenAI models
Set frequency and presence penalties to reduce the tendency of OpenAI models towards repetition.
| Term | Definition |
| --------------------- | ------------------------------------------------------------------------------------------------------------------------------------------------------------------------------------------------------------------------------------------------------------------------------------------------------------------------------------------------------------------------------------------------------------------------------------------------------------------------------------------------------------------------------------------ |
| **Presence penalty** | Penalizes new tokens based on whether they appear in the text so far. Higher values encourage the model to use new tokens, that are not penalized. |
| **Frequency penalty** | Penalizes tokens based on their frequency in the text so far. Higher values discourage the model from repeating the same tokens too frequently. |
| **Token** | A token is a unit of text, such as a word, subword, punctuation mark, or symbol. Models split all input and output text into tokens for processing. Model providers use tokens as the basic unit for measuring model usage. Input tokens from your prompt and output tokens from the model's response contribute to your credit consumption. For more information, see [Tokens](https://autosheet.com/docs/resources/models/tokens) and [How credits are consumed](https://autosheet.com/docs/resources/pricing/how-credits-are-consumed). |
1. In the GPT for Docs sidebar, expand **Model settings**.

2. Set **Presence penalty** and **Frequency penalty** from 0 to 2.
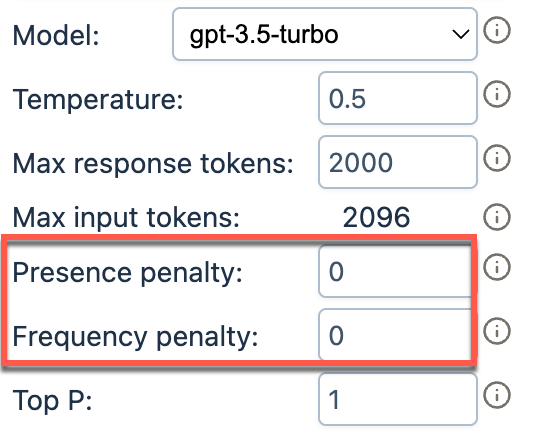
The AI uses the new penalty values when generating responses in the current document.
## What's next
- [Select the model](https://autosheet.com/docs/gpt-for-docs/configure/select-model) that best fits your needs.
- [Reuse prompts.](https://autosheet.com/docs/gpt-for-docs/use/reuse-prompts)
- [Provide context for prompts.](https://autosheet.com/docs/gpt-for-docs/use/provide-context-for-prompts)